How to clean suede shoes
Shoes faithfully accompany us on all our adventures. We wear them every day and in all sorts of conditions and often take them off in the evening – maybe covered with mud and dirt if, for example, we have just come back from a hike in the mountains – and put them back on the shoe rack without taking care of them. Yet herein lies the secret to making shoes last a long time: maintenance and cleaning operations are essential to keeping their functional properties and quality intact over time. But what is the best way to do this?
First of all, we need to carry out some preparatory operations, which apply to all types of footwear. Let’s have a look at these together:
Stage 1: Preparation
Before starting to clean footwear, we must first carry out a number of important preparatory stages, which apply to all types of uppers:

Let the shoe dry naturally, avoiding direct exposure to sunlight, heaters and other sources of heat as these could dry out the leather and plastic parts and make the adhésives gluing the sole and uppers together become unstuck.

Remove the laces and insoles to encourage aeration of the linings, making sure that these are in good condition and have no tears or abrasions, and check that the laces are not worn out.
Stage 2: Cleaning
Suede is one of the most widely used and popular materials for manufacturing footwear, especially due to its suppleness and comfort.
It dffers from full grain leather in that it requires more careful maintenance in order to maintain its original qualities over time.

Cleaning starts using a damp cloth to remove dirt. In the case of more persistent dirt, such as soil or mud residues, a brush with stiff bristles can also be used.

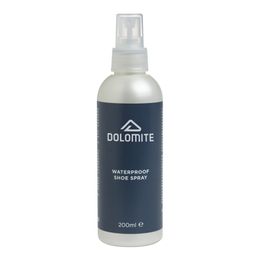
Once the surface of the shoe is clean and dry, we recommend protecting it using a water-based waterproofing spray, such as “Dolomite” spray. Shake well before use and apply two layers to the uppers from a distance of around 20 cm. Wait 5 minutes before repeating the operation.

Before using the shoes again, it is a good idea to leave the leather to rest for a few hours to allow the products used to be properly absorbed. Lastly, insert the laces and insoles again ensuring first that these are completely dry.
Stage 3: Maintenance
And last but not least, here are a few practical rules and tips that will help you make your shoes last longer. When buying footwear, it is important to remember that it is in our interest to make them last as long as possible, but it is also our duty towards the environment to ensure they don’t deteriorate before time, therefore we should look after them sustainably before and after use.

To keep our shoes in their best condition when we are not wearing them, remember to Always remove the insoles and insert some screwed up newspaper – especially into the toe – so they maintain their original shape.

We also recommend storing shoes inside their original box, covered with the tissue paper inside, in a dark, dry place where the temperature remains fairly constant.
Do you know that...

Did you know that the first shoes to set foot on the summit of K2 were actually Dolomite leather boots? It was 31 July 1954, around 6 o’clock in the evening, when after a long agonizing ascent, mountaineers Achille Compagnoni and Lino Lacedelli finally reached the summit for the first time in history. Accompanying them on this venture were precisely Dolomite leather boots, hand made in Italy. The expedition was an incredible success and became an epic account of tenacity and determination, a legendary tale that continues to inspire people to this day.


